Shop Lifelike

Your Lifelike Christmas Tree: Assembly, Care and Storage

Bringing out your lifelike Christmas tree is the first step to setting a festive mood for the season. With lush, realistic branches and twinkling lights, a lifelike tree offers all the charm of the holiday season without the mess. Here’s how to make assembling, caring for, and storing your tree a breeze so you can enjoy its beauty for years to come!


lifelike christmas tree

Assembling Your Lifelike Christmas Tree

Unpacking and setting up your tree can be enjoyable, especially with these easy steps:

  1. Find All Your Pieces: Start by locating the tree’s base, screws, and sections labeled A, B, and C. You’ll feel ready to build as you arrange everything in order!
  2. Set Up the Stand: Thread the screws into the stand halfway—this helps make inserting the tree stable. Once section C is placed in the stand, tighten those screws for a secure fit.
  3. Fluff and Shape: Plug in the power cord, and let the fun begin! Fluffing brings your tree to life, so take your time with each branch. Start from the inside and work out, adjusting each branch up, down, and sideways to fill any gaps and create a full, natural look.
  4. Build Up with Section B: Insert section B, letting the trunk automatically connect the lights. Fluff again, continuing to shape each branch for a balanced, lush look. Finally, do the same for section A.
  5. Enjoy the Lights: With multiple lighting programs, you can experiment with fades, twinkles, and festive flashes that add sparkle to your tree.


Caring for Your Tree During the Holidays

Maintaining your tree’s appearance is simple and ensures it stays lovely all season long:

  • Regular Dusting: Gently dust the branches with a feather duster or soft cloth, which keeps the greenery looking fresh and vibrant.
  • Mind the Ornaments: Be mindful not to overload branches with heavy ornaments, which can weigh them down or disrupt the lighting connections.
  • Light Maintenance: Periodically check your tree’s lights to make sure connections are secure, and replace any bulbs that may have dimmed or gone out.


Storing Your Tree Safely After the Season

With a bit of care, you’ll have your tree neatly stored and ready for future holiday cheer.

  1. Turn Off and Disassemble: Make sure to unplug the tree, then carefully remove sections A and B. Loosen screws to detach section C from the stand.
  2. Protect Electrical Parts: Use the included caps to protect electrical connectors and avoid damage in storage.
  3. Choose Your Storage Solution: Ideally, use a designated tree storage bag for protection. If you don’t have one, the original box or large plastic bags work too. Place two tree sections in the box and the third in a bag for a snug fit.
  4. Remove Batteries: Avoid corrosion by taking the batteries out of your remote.
  5. Secure Accessories: Use a twist tie or zip tie to attach the remote and any other small items to the stand, so everything stays together.
  6. Pack Up Neatly: Place the stand at the bottom of your storage bag, then stack the tree sections from largest to smallest. To save space, alternate the branches in opposite directions with connectors facing outward.


Now, your tree is tucked away safely, ready for next year! A little extra care in assembling, maintaining, and storing your lifelike Christmas tree means it will sparkle and shine for many holidays to come.  And of course, if you have any questions feel free to reach out to us or come visit us at any one of our 7 locations!  Happy decorating!


Cyclamen Care: How to Keep Them Happy and Healthy

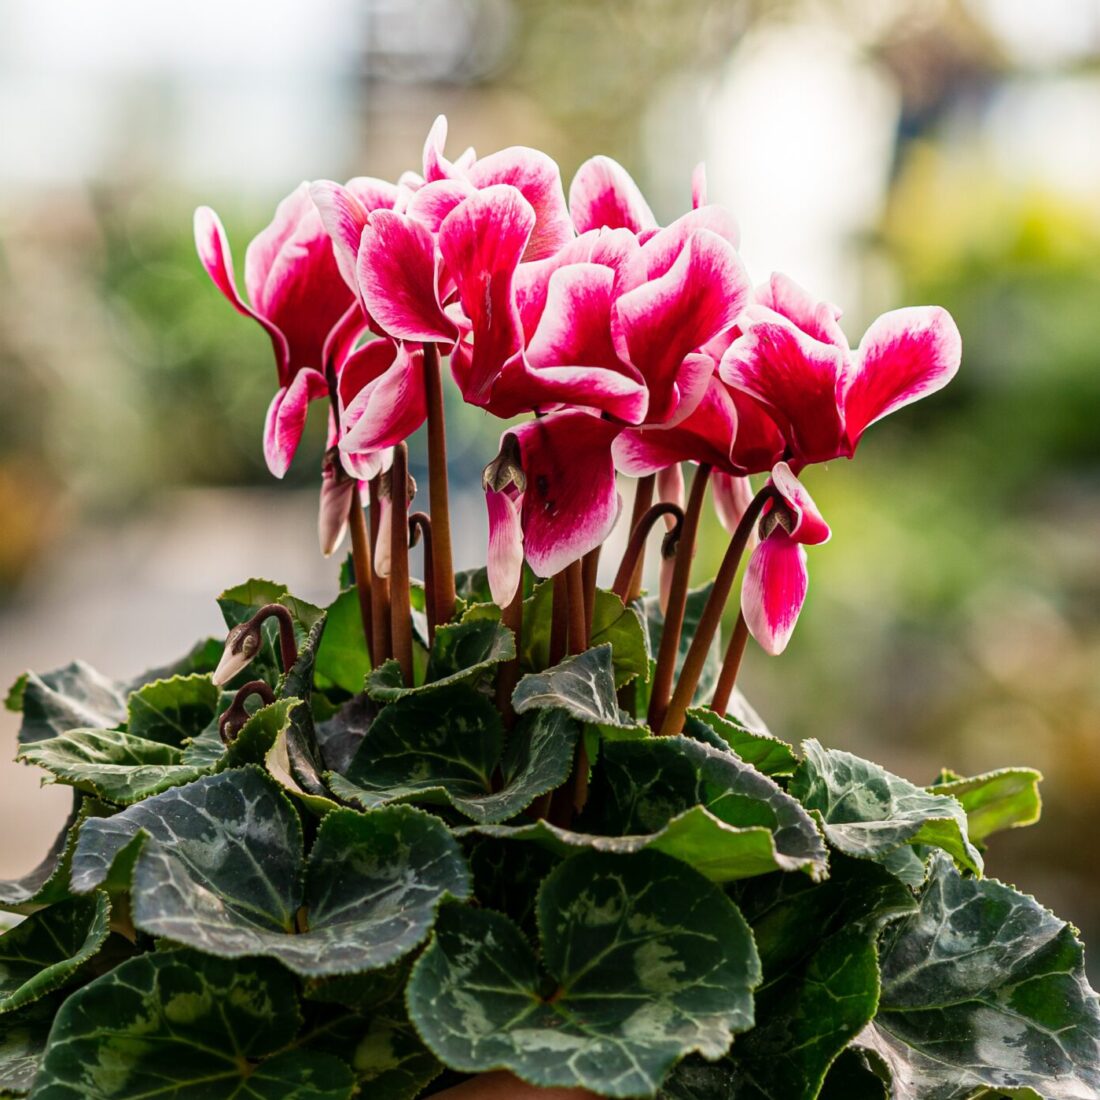
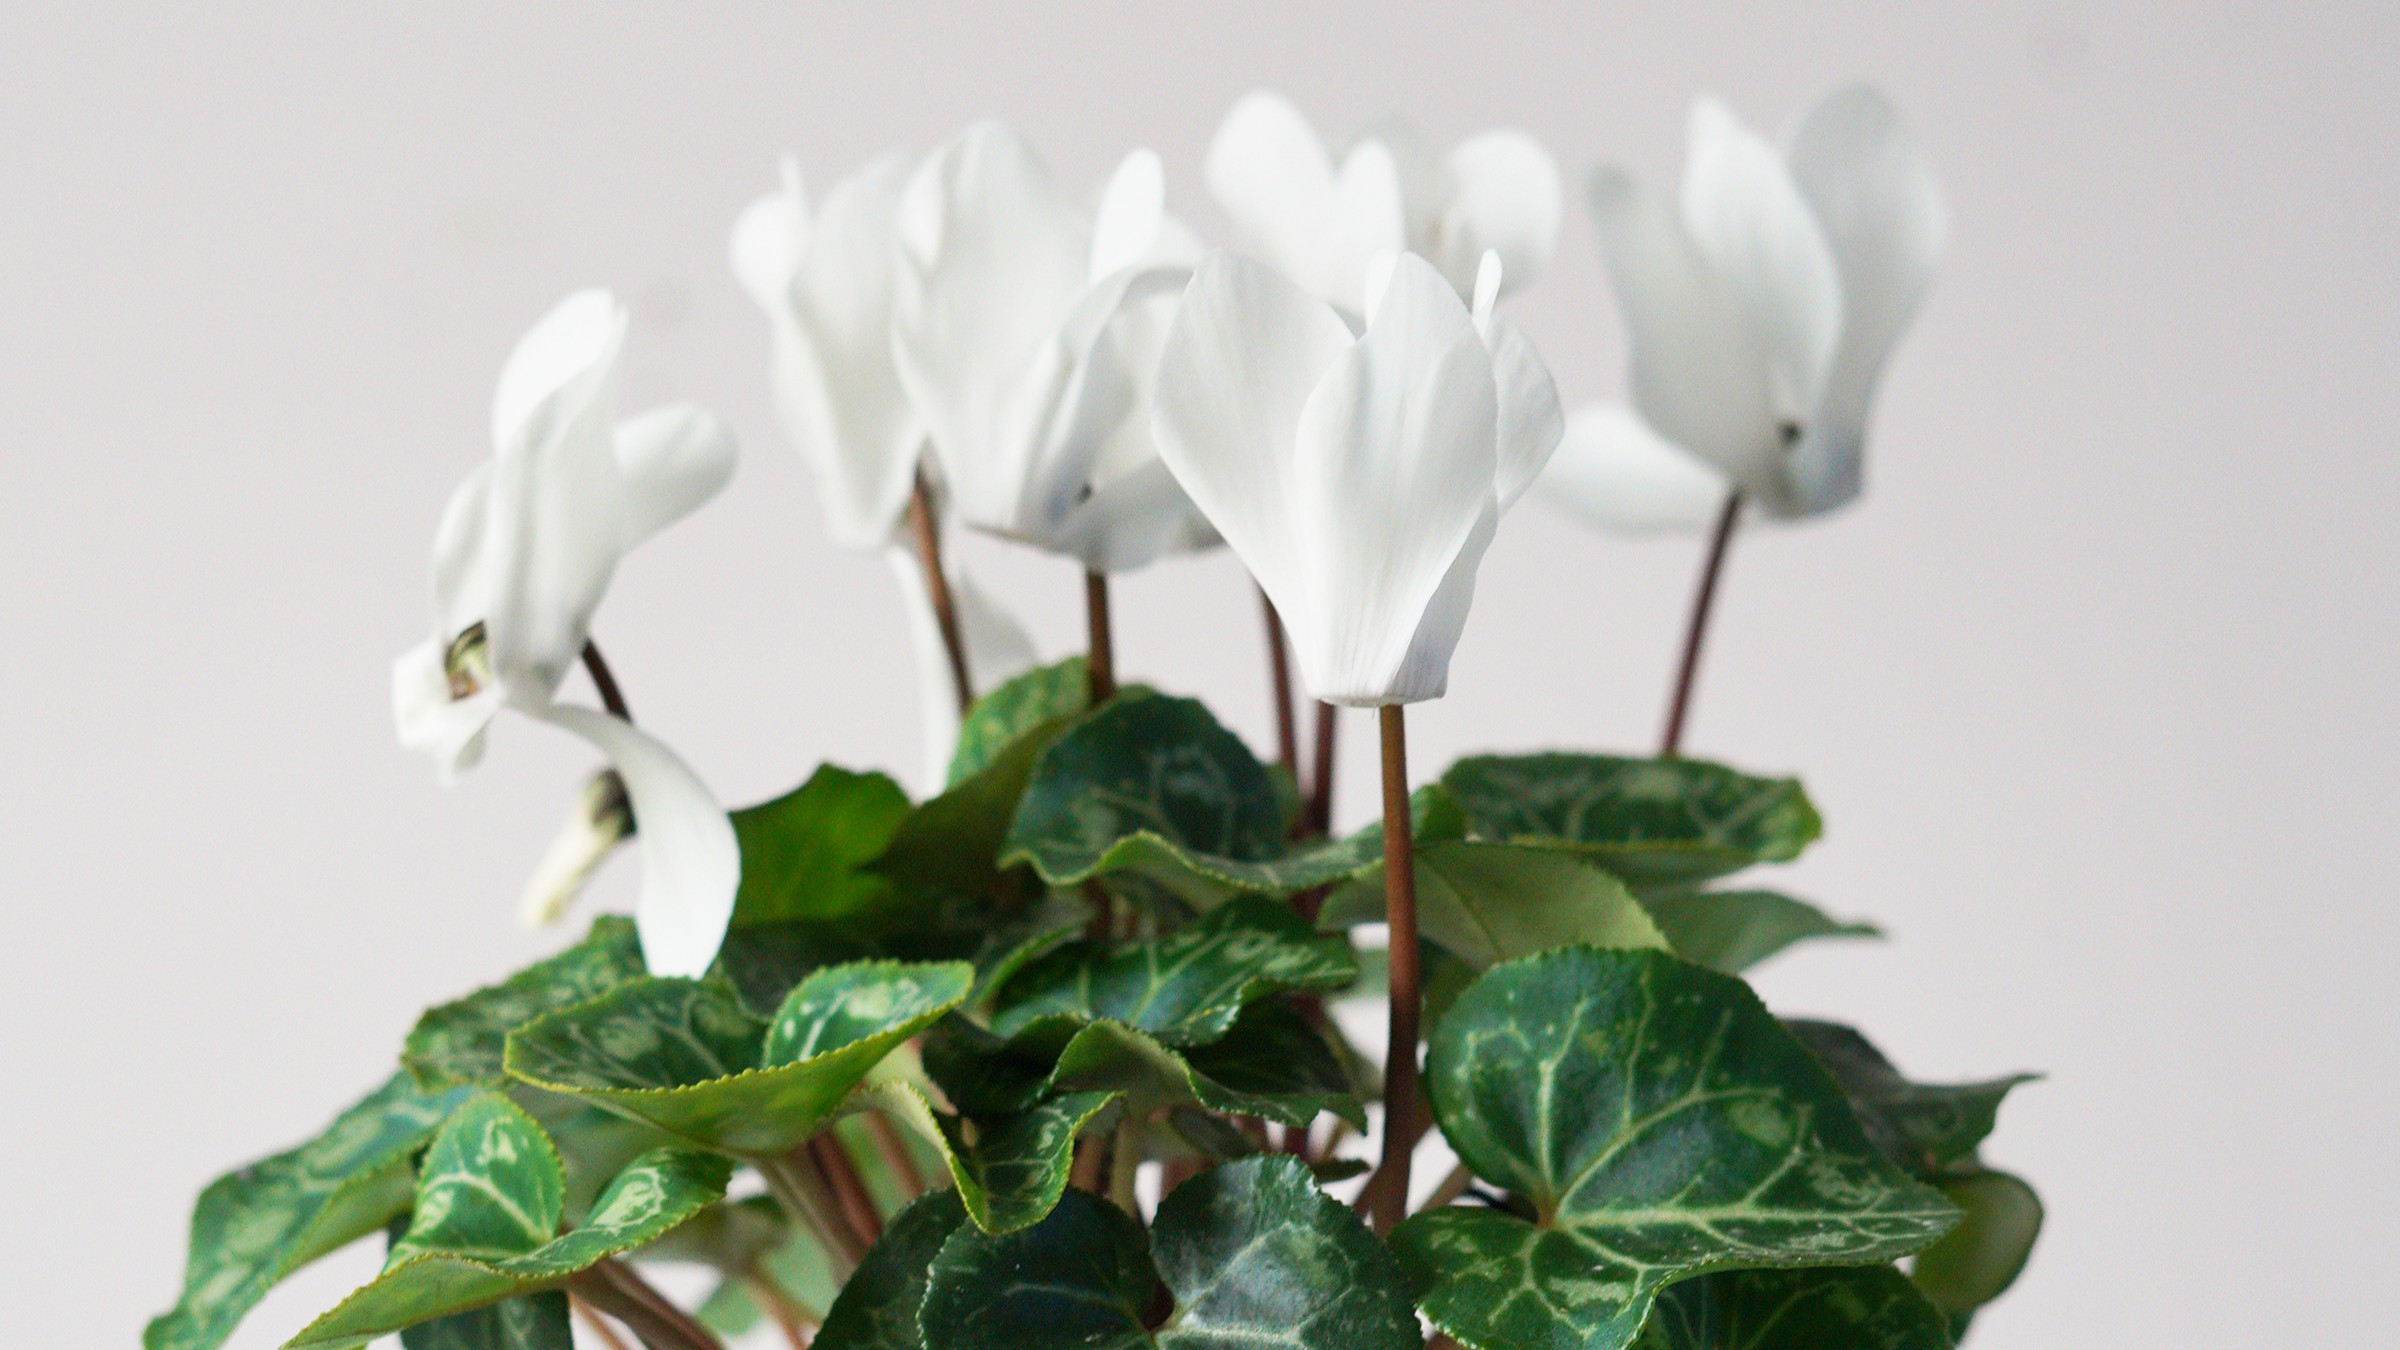
Cyclamen plants are a real treat for anyone who loves a pop of color during the cooler months. With their vibrant, butterfly-like flowers in shades of pink, red, white, and purple, they can really brighten up a room or garden when most other plants are going dormant. Plus, their unique heart-shaped leaves with silvery patterns add extra charm. But despite their delicate appearance, cyclamen are tougher than they look—as long as you know a few key care tips!


What is Cyclamen?

Cyclamen is a genus of plants that come from Mediterranean regions, meaning they love cool weather and have adapted to survive through hot summers. The most commonly grown type is Cyclamen persicum, which is what you’ll usually find in garden centers, especially around fall and winter.

These beauties are known for their unusual growth habits: they’re actually dormant in summer and start perking up when temperatures drop. So if you notice your cyclamen fading in late spring, don’t worry—it’s just going to sleep for a bit!

How to Care for Your Cyclamen

Here’s everything you need to know to keep your cyclamen thriving:

1. Light

Cyclamen love bright, indirect light. If you’re growing them indoors, place them near a window where they can get plenty of light but avoid direct sunlight, which can scorch the leaves. In a garden, they do well in partial shade. Think of their natural habitat—they’re used to growing in the dappled light under trees, so try to mimic that.

2. Temperature

This is one of the most important aspects of cyclamen care. These plants prefer cooler temperatures, ideally between 50°F and 65°F (10°C to 18°C). They don’t do well in hot environments, so keep them away from heating vents, radiators, or direct sun during hot spells. If your home is warmer, try moving them to a cooler room, like a porch or an unheated hallway, especially at night.

3. Watering

Cyclamen are a little picky about water, but once you get the hang of it, it’s easy! The best way to water is from the bottom. Place the pot in a shallow dish of water and let the plant soak for about 20-30 minutes. This method helps prevent water from sitting on the tuber (the swollen root structure) and leaves, which can lead to rot.

Water when the soil feels dry to the touch, but be careful not to let it dry out completely. During their active growing period (fall to spring), they’ll need more water. In summer, when they’re dormant, ease off the watering—just give them a little sip occasionally.

4. Humidity

Cyclamen like a bit of humidity, but not too much. If the air in your home is very dry, especially in winter, place a shallow dish of water nearby to create some humidity. You can also mist the air around the plant, but avoid misting directly onto the plant itself, as wet leaves can invite disease.

5. Fertilizer

During the growing season (fall to spring), feeding your cyclamen every 2-3 weeks with a balanced liquid fertilizer will keep them healthy and encourage more blooms. Just be sure to dilute the fertilizer to half the strength recommended on the package to avoid overfeeding.

6. Repotting and Dormancy

Cyclamen grow from tubers, which swell over time. If you notice your plant is getting crowded in its pot, it’s time to repot—ideally in the fall, just before the growing season kicks off. Use a well-draining potting mix to help prevent root rot, and make sure the tuber sits just above the soil surface.

As for dormancy, don’t panic if your cyclamen starts to look a little sad in late spring! It’s perfectly normal for the plant to go into a resting phase during the warmer months. The leaves will yellow and die back, but the tuber will still be alive. At this point, stop fertilizing and reduce watering. You can even move the plant to a cool, dark spot. Once fall rolls around again, new leaves will start to grow, and you can resume regular care.


Common Cyclamen Problems (And How to Fix Them)

Like any plant, cyclamen can run into a few issues, but most are easy to fix:

  • Yellowing leaves: This is often a sign of overwatering or that the plant is too warm. Make sure you’re letting the soil dry out between waterings and move the plant to a cooler spot.
  • No flowers: Cyclamen need cool temperatures to bloom. If you’re not seeing any flowers, try moving it to a cooler location and check if it’s getting enough indirect light.
  • Drooping leaves and flowers: If the plant is wilting, it could be thirsty. Check the soil, and if it’s dry, give it a good soak from the bottom.

Bonus Tip: Keeping Cyclamen Year After Year

Cyclamen are often treated as temporary plants, but with the right care, you can enjoy them year after year! After they finish blooming and go dormant in the summer, resist the urge to toss them. Just follow the dormancy care tips above, and your cyclamen will reward you with another round of beautiful blooms when the weather cools down again.


cyclamen care


With a little attention to their unique needs, cyclamen plants are not only beautiful but also relatively easy to care for. Just remember: cool temperatures, bright indirect light, and a balanced watering routine are key to keeping your cyclamen happy.  Come into any of our 7 locations and pick up one for yourself! Happy gardening! 🌸

christmas cactus plant care

Christmas Plants: How to Keep Your Holiday Greens Happy

Nothing brings the holiday spirit quite like the beauty of Christmas plants. From the vibrant reds of poinsettias to the delicate blooms of Christmas cactus and the graceful green branches of Norfolk Island pine, these plants add warmth, charm, and cheer to any home. Here’s a guide on caring for these festive favorites, so they stay healthy and beautiful throughout the season and beyond.


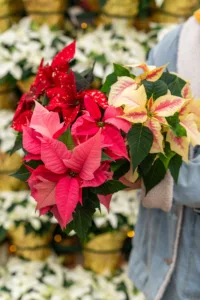
christmas plants poinsettia

Poinsettias: The Classic Christmas Flower

Poinsettias are a holiday favorite, known for their striking red leaves (called bracts) and lush green foliage. They’re perfect for adding a splash of color to any room!

How to Care for Your Poinsettia:

  • Light: Place your poinsettia in a spot with bright, indirect sunlight. A window with morning sun is ideal.
  • Watering: Water when the top two inches of soil is dry. Allow water to drain away to avoid soggy roots, which poinsettias don’t like.
  • Temperature: Keep your plant in a warm room, ideally around 65-75°F, and away from cold drafts or direct heat sources.
  • Pet & Child Safety: Contrary to popular belief, poinsettias aren’t as toxic as once thought. While not recommended for snacking, they’re generally safe around pets and children, though they may cause mild discomfort if ingested.

Fun Fact: Poinsettias are native to Mexico, and their original bright red color has been joined by new varieties, including whites, pinks, and even speckled designs.


christmas cactus plantsChristmas Cactus: The Blooming Winter Wonder

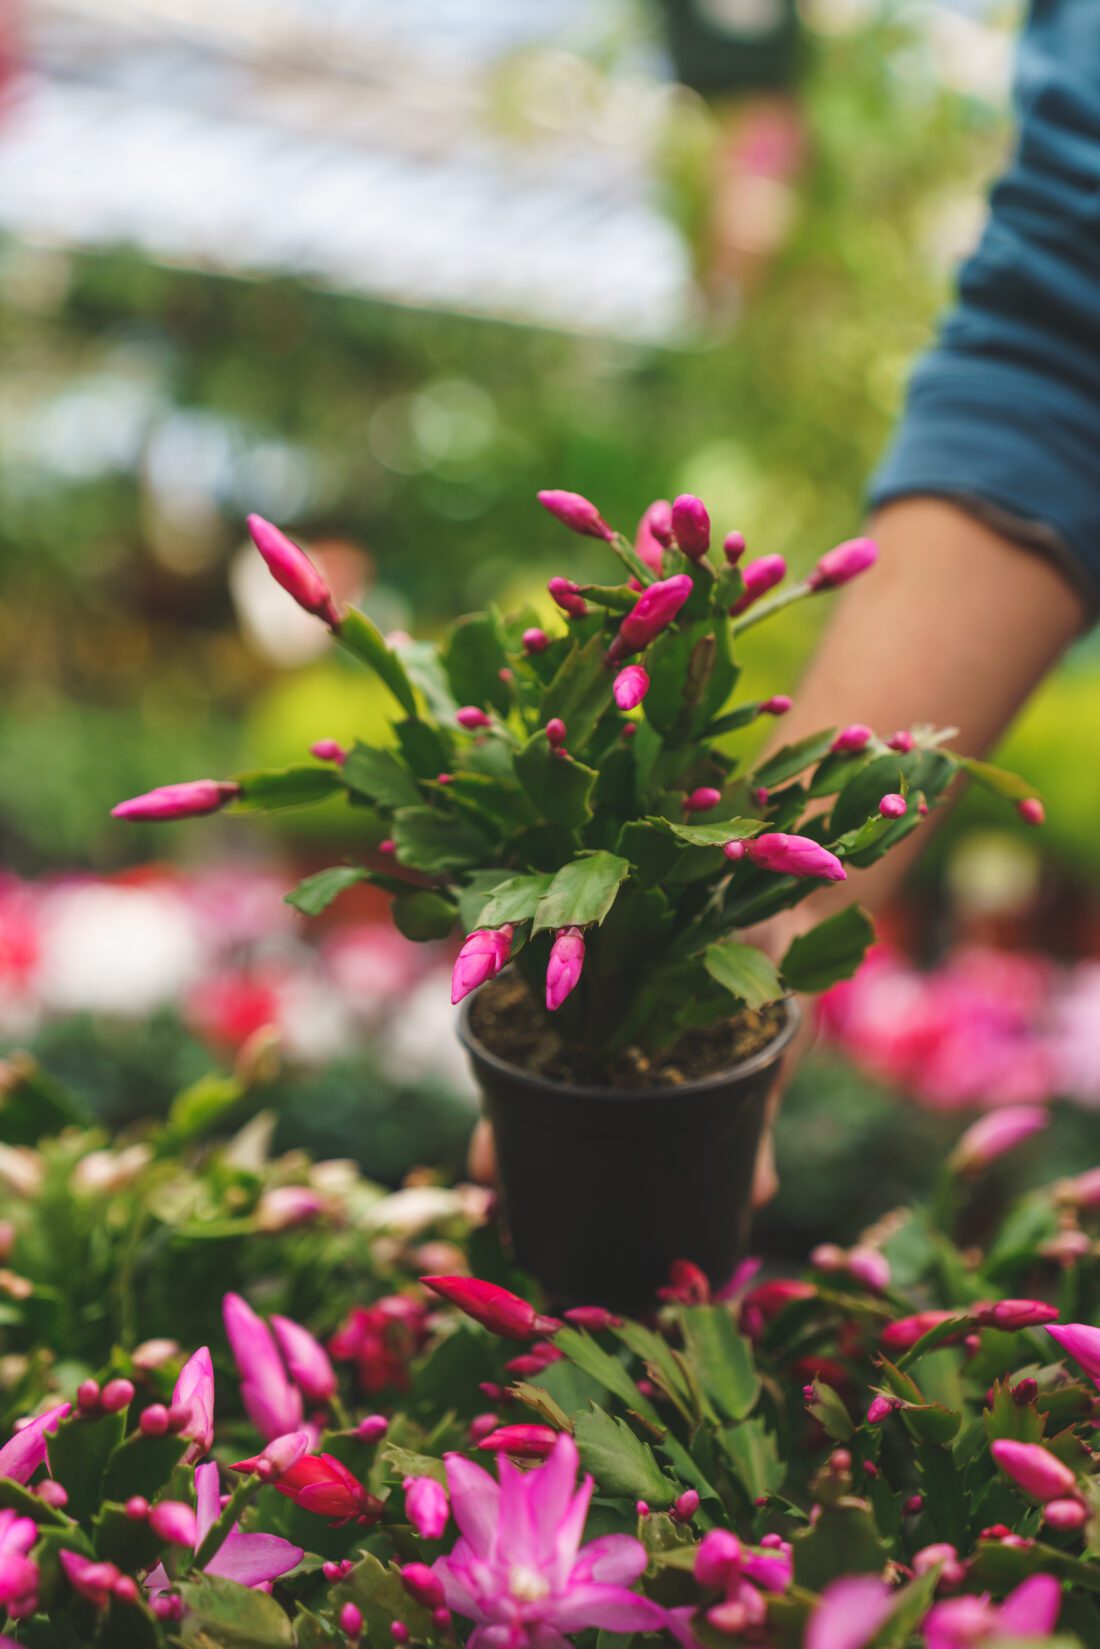
Known for its beautiful, cascading blooms that appear during the winter months, the Christmas cactus is a unique holiday choice. Its vibrant flowers add a pop of color during a time when most other plants are dormant.

How to Care for Your Christmas Cactus:

  • Light: Place it in bright, indirect light. Avoid direct sunlight, which can burn its leaves.
  • Watering: Water when the soil is dry to the touch. Over-watering can cause root rot, so be mindful to let the soil dry a bit between waterings.
  • Encouraging Blooms: For the best chance of winter blooms, reduce the plant’s light exposure in the fall (around October) and place it in a cooler room at night. These conditions help trigger flowering just in time for Christmas.

Tip: The Christmas cactus is easy to share! You can propagate it from cuttings, making it a perfect gift for friends and family during the holiday season.


norfolk island pineNorfolk Island Pine: A Mini Christmas Tree
With its soft, needle-like branches, the Norfolk Island pine is a popular alternative for those who want a mini Christmas tree. It’s perfect for decorating with small ornaments and string lights, bringing a festive touch to even the coziest spaces.

How to Care for Your Norfolk Island Pine (you can also check out our blogpost on the topic for more detail!):

  • Light: Norfolk Island pines need bright, indirect light. A well-lit room is ideal.
  • Watering: Keep the soil consistently moist but not soggy. Water when the top layer begins to feel dry, and make sure your pot has good drainage.
  • Humidity: These pines love humidity! If your home tends to be dry during winter, especially with indoor heating, mist the plant regularly or place a humidifier nearby to keep it thriving.

Decorating Tip: Since Norfolk pines are slow-growing, you can keep and enjoy them for many holiday seasons to come. Add lightweight ornaments to avoid weighing down the branches, and enjoy your own miniature tree.


christmas plants cyclamenCyclamen: The Winter Bloomer

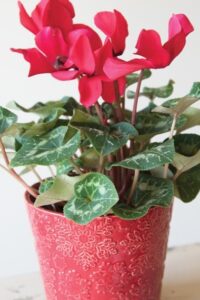
Cyclamen plants are known for their delicate, butterfly-like blooms in shades of pink, red, white, and purple. With their unique marbled leaves, cyclamen make a beautiful addition to holiday decor, bringing a fresh and cheerful look to any indoor space.

How to Care for Your Cyclamen:

  • Light: Place cyclamen in bright, indirect light, but avoid direct sunlight as it can be too intense for their delicate blooms.
  • Watering: Keep the soil evenly moist, but be cautious not to overwater. Water from the base by placing the pot in a shallow dish of water and letting the plant absorb what it needs for a few minutes. Avoid getting water on the leaves and crown to prevent rot.
  • Temperature: Cyclamen thrive in cooler temperatures (around 60-65°F). Avoid placing them in overly warm rooms, as they prefer the chill of winter to bloom their best.
  • Dormancy: After the blooming period, cyclamen often go dormant. Don’t be alarmed if the leaves yellow and die back. Reduce watering, and store the plant in a cool, dark place until new growth begins in late summer or early fall.

Tip: Cyclamen can rebloom year after year! Just give them a cool rest period after flowering, and they’ll reward you with fresh blooms next winter.


christmas plants lemon c ypressLemon Cypress: The Festive, Fragrant Evergreen

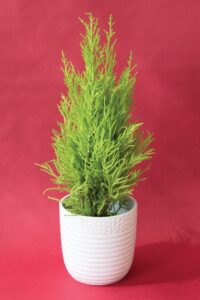
Lemon cypress, with its bright yellow-green foliage and refreshing lemon scent, adds a unique pop of color and fragrance to holiday decor. These charming little evergreens are perfect as tabletop trees or as accents for mantels and entryways.

How to Care for Your Lemon Cypress:

  • Light: Lemon cypress thrives in bright, direct light. Place it near a sunny window where it can get at least 6 hours of sunlight daily.
  • Watering: Keep the soil consistently moist, but avoid overwatering. Check the top inch of soil and water when it starts to feel dry. Lemon cypress doesn’t like to dry out, so maintain a regular watering schedule.
  • Temperature: Prefers cooler temperatures around 50-65°F. Avoid placing it near heaters or fireplaces, as it does best in a cool, stable environment.
  • Humidity: While it can adapt to average indoor humidity, lemon cypress will benefit from occasional misting, especially in dry indoor air.

Tip: Lemon cypress can be moved outdoors in spring! In warmer months, it makes a lovely addition to outdoor container gardens or can be planted in the ground in milder climates.


General Tips for Holiday Plant Care

  • Avoid Direct Heat & Cold Drafts: Place holiday plants away from heating vents, fireplaces, or drafty doors. Sudden temperature changes can stress the plants.
  • Watch the Watering: Plants need less water in winter, so be cautious not to overwater. Check soil moisture first.
  • Add Some Fertilizer (After the Holidays): Once the holiday season is over, consider adding a balanced fertilizer in spring to support new growth for the next year.


These festive plants don’t just add beauty to your holiday decor; they can be a lasting part of your indoor garden with a little care. So go ahead and bring the spirit of the season into your home with poinsettias, Christmas cactus, and Norfolk pines – and enjoy the warmth they add all winter long.

And if you’d like to listen to our Greenhouse Expert, Farid, talk about this topic with our friend Maria from Growing Joy with Plants Podcast, click below!  You can also come visit us at any of our 7 locations for in-person advice!


NORFOLK ISLAND PINE

Norfolk Island Pine 101: Indoor Care Tips for a Happy Tree

The Norfolk Island Pine (Araucaria heterophylla) is one of those versatile and charming plants that can easily steal the spotlight whether it’s gracing your living room or beautifying your garden. Although it’s not a true pine tree, it has a similar stately, evergreen appearance that makes it stand out. It’s often associated with Christmas because of its tree-like structure, but it’s a wonderful plant to enjoy year-round. So, if you’re wondering how to keep your Norfolk Island Pine thriving!


norfolk island pine


What’s So Special About Norfolk Island Pine?

Native to Norfolk Island in the South Pacific, this plant has a tropical vibe while still maintaining the classic “pine” look we associate with the holidays. Indoors, it makes a perfect little house tree, growing slowly and staying manageable. Outdoors in the right climate (that’s way down south in zones 10 and 11), it can become a tall and impressive specimen tree!

Fun fact: In its natural habitat, it can grow over 200 feet tall! But don’t worry—indoors it grows much more slowly, topping out around 6 feet if given the space.

Now, let’s break down how to care for this beauty!


Light: Bright, But Indirect

Norfolk Island Pines love bright, indirect light. Place your plant near a sunny window, but make sure it doesn’t sit in the direct sun all day. Too much sunlight can cause the needles to brown, while too little light can make the plant grow leggy (stretched out) as it searches for the sun. If you don’t have a spot with enough natural light, a grow light can help give it a boost.

Tip: Rotate your plant every few weeks so it grows evenly and doesn’t lean toward the light source.


Watering: Just Right

The Norfolk Island Pine prefers soil that’s moist but not waterlogged. The trick is to water when the top 1-2 inches of soil are dry to the touch. Water thoroughly, letting the excess drain out of the pot’s bottom, and then wait until the soil dries out before watering again. Too much water can lead to root rot, while too little can make the needles turn brown and crispy.

During winter months, when the plant isn’t growing as much, reduce your watering schedule. Your pine won’t need as much water during this time.

Tip: If you’re unsure, it’s better to err on the side of slightly dry rather than overwatered. They’re more tolerant of drought than soggy soil.


Humidity: Keep It Moist

Being from a tropical island, Norfolk Island Pines thrive in humid environments. If the air in your home is too dry (especially in the winter when the heat is on), the tips of the branches might start to brown. To keep the air around your plant humid, you can:

  • Use a humidifier near the plant.
  • Place a humidity tray (a shallow dish filled with water and pebbles) under the pot.


Norfolk Island Pines will appreciate the extra humidity and reward you with lush, green branches.


Temperature: Cozy and Stable

Your Norfolk Island Pine prefers normal room temperatures between 65°F and 75°F. Avoid cold drafts from doors or windows, and keep the plant away from heat sources like radiators or vents that could dry it out. Sudden temperature changes or extremes can stress the plant, so aim to keep its environment steady and comfortable.


Fertilizing: Feed It During the Growing Season

In spring and summer, you can give your Norfolk Island Pine a little boost by fertilizing it. Use a balanced, water-soluble fertilizer (like a Espoma Organics Indoor) once a month to encourage healthy growth. In the fall and winter, the plant’s growth slows down, so you can stop fertilizing until the next spring.


Repotting: Only When Necessary

Norfolk Island Pines grow slowly indoors, so you won’t need to repot often—probably only every 3-4 years. When you do, choose a pot that’s just one size larger (approximately 2 inches bigger in diameter) than the current one and use a well-draining potting mix. A good mix for this plant would be something with a combination of regular potting soil, sand, and perlite for drainage.


Common Indoor Problems and Solutions

Even with the best care, you might encounter a few issues with your Norfolk Island Pine. Here’s how to handle the most common problems:

  • Browning Tips: If you notice the needle tips turning brown, it’s often due to low humidity or underwatering. Increase humidity around the plant or adjust your watering schedule.
  • Yellowing or Drooping Branches: This can be a sign of overwatering. Check the soil and make sure it’s not soggy. Allow it to dry out before watering again.
  • Leggy Growth: If your plant starts looking stretched out with long spaces between branches, it’s not getting enough light. Move it to a brighter spot or supplement with a grow light.

NORFOLK ISLAND PINE


The Norfolk Island Pine is a wonderful indoor companion, bringing an air of grace and calm to any room. With the right balance of light, water, and humidity, it will thrive and stay green year-round. It’s slow-growing, so you won’t need to worry about it outgrowing your space anytime soon—just enjoy its beauty and tropical charm!


Visit any of our 7 locations this holiday season and pick one up for yourself and may your Norfolk Island Pine bring a bit of island magic to your home! 🌿

SHOP NORFOLK PINE ONLINE


Frost covered branch image

Getting Your Garden Cozy for Winter: A New England Guide


As the temperatures drop and the days grow shorter, it’s essential to prepare your garden for the brisk New England winter. While we may be bidding farewell to our colorful blooms, there’s no reason your garden can’t be a haven of beauty and potential even during the cold season. Proper winterization will help protect your plants, garden structures, and soil, ensuring a healthy and vibrant garden in the coming spring! So, grab your gardening gloves, and let’s get to work on prepping your garden for a cozy New England winter! 


Prune Sparingly and Leave the Leaves

Gently prune any dead, damaged, or diseased parts of your perennial plants and remove them from your garden While it may be tempting to do a big fall cleanup, consider resisting the temptation. For more information about the benefits of “leaving the leaves” click here!  


Bury Those Bulbs

One key task during this season is planting bulbs that will burst forth in a symphony of colors come spring. Fall is the opportune time to tuck bulbs into the soil, allowing them the necessary period of dormancy to thrive in the warmer months. If you’re eager to delve into the art of fall bulb planting, be sure to check our detailed guide to fall bulb planting. Discover the joy of anticipation as you envision the beauty that will unfurl in your garden when winter’s chill gives way to the blossoming wonders of spring.


Mulch It Up

Mulch is your garden’s best friend in winter. A thick layer of mulch (about 2-4 inches) will help insulate your plants’ roots and protect them from the harsh cold. Use organic mulch such as leaves, straw, or compost. This not only keeps the soil temperature more stable but also enriches it with nutrients for the coming spring.


Click to order bagged mulch and compost


prepare your garden for winter


Protect Vulnerable Plants

Some plants, especially newly planted ones, are more susceptible to frost and freezing temperatures. Protect them by covering them with burlap or frost cloth. Be sure to remove these covers during the day to allow for sunlight and air circulation. Most evergreen shrubs would also benefit from an application of Wilt Stop. This will reduce moisture loss during the winter months and protect plants from windburn.  


Bring Potted Plants Indoors

If you have potted plants that aren’t winter-hardy, bring them inside before the first frost. Place them in a sunny spot, and don’t forget to water them sparingly, as they won’t need as much moisture in the winter months. 


Clean and Store Tools

Before winter sets in, it’s a good idea to clean and store your gardening tools properly. Make sure they are free of dirt and moisture to prevent rust. This will ensure they’re ready to go when spring comes around. But if winter does get the best of your tools, you can find the tools to meet your needs here. 


Plan Ahead!

Winter is a wonderful time to reflect on the past season and plan for the next. Take note of what worked and what didn’t and sketch out any changes or new additions you want to make in your garden. This planning will help you hit the ground running when the snow melts. 


Bird Feeding Stations

Don’t forget about our feathered friends! Setting up bird feeding stations with birdseed and water will not only provide a food source for local wildlife but also add a touch of life and activity to your winter garden. Shop our favorite products here.


Enjoy The Beauty of Winter

Winters can be long and challenging, but they also have a unique beauty. Take some time to enjoy your garden’s winter aesthetics – the frost-kissed plants, the glistening snow, and the tranquility of a dormant landscape. Consider adding some outdoor seating or a fire pit to make your garden a cozy, winter retreat. 

In New England, a well-prepared garden can still bring joy and inspiration even during the coldest months. With a little TLC and some planning, your garden can emerge from winter stronger and more beautiful than ever. So, get out there, wrap up warmly, and let’s prepare our gardens for a wonderful New England winter! 


Kristine from Mahoney’s Growing shares locally grown Flowering Kale and Cabbage

In this video, Kristine from Mahoney’s Growing in Woburn, Massachusetts shares insights on our locally grown Flowering Cabbage and Kale, perfect for adding vibrant, long-lasting color to your fall garden with minimal maintenance. Featured varieties include Osaka Pink, Osaka Red, and Nagoya White. These hardy plants are a beautiful way to brighten up your outdoor space all season long.

Take a look at the flowering cabbage and kale we have to offer on our online store, or by coming into any of our 7 locations!


Intention Gardening: Grow Your Dreams, One Plant at a Time

Have you ever considered that your garden could be more than just a pretty space, but also a place where you grow your intentions and manifest your dreams? Welcome to the world of intention gardening and horticultural spell jars! 🌿✨ 

Intention gardening is a mindful and spiritual practice where plants are chosen and nurtured based on the energies and meanings they represent. Whether you want to bring more peace, love, or personal power into your life, the plants in your garden (or your home) can become living symbols of those desires. Plus, who doesn’t love the idea of getting closer to nature while also setting powerful intentions? 

Let’s dig into some plants that are perfect for this type of magical gardening and learn how you can incorporate them into horticultural spell jars or other intention-setting rituals. 

Plants for Intention Gardening 

Every plant has its own unique energy, and by choosing the right ones, you can align your garden with the goals and intentions you’re working towards. Here are a few standout plants that bring powerful vibes into any space: 

  1. Red Chili 🌶️ – Resistance

Red chili peppers are fiery in more ways than one. These spicy little wonders are perfect for building up resistance and personal strength. If you’re facing challenges or obstacles, red chili can serve as a reminder of your inner fire and determination to push through. 

Intention Tip: Plant a red chili in your garden or keep dried ones in a jar to ignite your resistance to negativity or difficult circumstances. 


  1. Dandelion Seeds and Flower Heads 🌼 – Resilience & Heartfelt Wishes

Dandelions are the ultimate symbol of resilience—they’re tough, adaptable, and can thrive in all kinds of conditions. Their seeds, when carried by the wind, represent heartfelt wishes, hopes, and dreams. 

Intention Tip: When blowing dandelion seeds, visualize your dreams taking flight. You can also include dried dandelion flowers in spell jars to help cultivate resilience during tough times. 

  1. Butterfly Pea Flower 🦋 – Evoking Your Highest Self

This beautiful blue flower is known for its transformative properties, helping you connect with your highest self and inner wisdom. Butterfly pea flowers are perfect for those moments when you need clarity and inspiration. 

Intention Tip: Use butterfly pea flowers in teas, spells, or intention jars when you’re seeking personal growth or self-discovery. 

  1. Dragon’s Blood Stonecrop 🐉 – Personal Power & Bravery

This striking succulent has an otherworldly energy that is all about personal empowerment. It’s connected to the heart and root chakras, radiating bravery and protection. Dragon’s Blood Stonecrop also acts as a shield against negativity, helping you maintain your peace. 

Intention Tip: Plant this stonecrop in areas where you want to feel empowered and safe. Or, place its leaves in a spell jar to protect your energy from external forces. 


dragons blood stonecrop sedum for botanical spell jar intention gardening


  1. Rex Begonia 🌿 – Peaceful Resolution

Rex begonias are beautiful and full of good vibes. They bring peaceful energy to conflicts and help everyone involved see things clearly, making them a great plant for fostering harmony. 

Intention Tip: Keep a Rex begonia near areas where conversations happen—like your living room or kitchen—so its peaceful energy can encourage calm and productive communication. 

  1. Laurel 🌱 – Victory & Self-Love

Laurel, also known as bay leaves, has long been a symbol of victory and personal achievement. It’s the perfect plant for moments when you want to celebrate your wins and remind yourself of your strengths. Plus, it promotes self-love and self-acceptance. 

Intention Tip: Write your goals or victories on a dried bay leaf and burn it as a way to honor your achievements. You can also add laurel leaves to spell jars for a boost of pride and motivation. 

  1. Gardenia 🌸 – Love & Pure Emotions

Known for its fragrant blossoms, gardenia is all about love—pure, unconditional, and accepting. It’s connected to the divine feminine but emits a universal energy that transcends gender, making it a wonderful plant for opening your heart to love in all its forms. 

Intention Tip: Grow gardenia near your home to invite love and emotional openness into your space. You can also dry the petals for bringing a peaceful, loving energy into a spell jar.  

gardenia for intention gardening horticultural spell jar

Creating a Horticultural Spell Jar 

Now that you know some of the amazing plants you can work with, let’s talk about how to create a horticultural spell jar. This is a simple yet powerful way to set your intentions using the energy of plants. Here’s how to do it: 

What You’ll Need: 

  • A small container or pot 
  • Plant materials (like flowers, seeds, or leaves) that match your intention 
  • A small piece of paper and pen 
  • Optional: crystals, small charms, or essential oils for added energy 

Steps: 

  1. Set Your Intention: Before you start, take a moment to clearly define what you want to manifest. Whether it’s love, protection, or personal growth, be specific with your intention. 
  1. Choose Your Plants: Pick plants that align with your intention. For example, if you’re seeking resilience, you might use dandelion seeds. If it’s loving energy, you could add gardenia. 
  1. Assemble the Jar: Plant your chosen plants into the container one by one, focusing on your intention as you do so. You can also add crystals or other items that hold meaning for you. 
  1. Seal the Spell: On a small piece of paper, write your intention (something like “I am protected” or “I welcome love into my life”). Fold the paper and place it in the soil. 
  1. Activate It: Hold the container in your hands and visualize your intention becoming reality. You can also say a few words aloud, like an affirmation or a blessing. 
  1. Place It: Keep your container in a special place where you’ll see it often. Every time you look at it, remember the energy you’ve infused into it. 


crystals for intention gardening and horticultural spell jars


The Power of Nature in Your Hands 

Intention gardening is a beautiful way to connect with nature while also working on your inner self. Whether you’re planting a chili for resistance or creating a spell jar with gardenia petals for love, you’re nurturing more than just a plant—you’re nurturing your dreams and desires. So get your hands dirty, lean into the magic of the garden, and watch as the seeds of your intentions bloom into reality! 🌱✨ 

Happy planting and manifesting! 


A Note on Cultural Respect and Sacred Plants 

As we explore intention gardening and spiritual practices, it’s important to do so with respect and mindfulness, especially when it comes to using sacred plants. Many plants like white sage, palo santo, sweetgrass, and ceremonial tobacco hold deep spiritual and cultural significance for Indigenous communities. These plants are used in sacred ceremonies and have been a vital part of their traditions for centuries. 

Unfortunately, these plants have been overharvested and commercialized, often without proper understanding or respect for their cultural importance. To avoid appropriation, it’s best to honor Indigenous knowledge by refraining from using sacred plants unless you’re invited to participate in those practices by someone from that culture. Instead, explore alternatives that align with your intentions but don’t infringe upon sacred traditions—like rosemary, lavender, or locally sourced herbs. 

Being mindful and respectful of where our practices come from helps us connect more deeply to the spirit of intention gardening while honoring the cultures that have nurtured these practices for generations. 🌱💚 


Creating the Perfect Fall Window Box

Autumn is here! See how Julia spruces up our Winchester store fall window boxes and front entrance with festive annuals and perennials.

The recipe for this delicious window box is as follows:

  • Echinacea
  • Celosia
  • Ornamental Grass
  • Swiss Chard
  • Jacob’s Ladder
  • Ornamental Cabbage or Kale
  • Ornamental Peppers
  • Mums
  • Sugar Pumpkins


For more fall foliage ideas check out our newest blog post on mum alternatives!


Make it easy: Order Pickup for Plants Here!


Green Giants of New England: Caring for Arborvitae and Western Red Cedar

If you’re looking to add some green charm to your New England garden, Arborvitae and Western Red Cedar is a great choice! These evergreen trees and shrubs not only add year-round beauty but also privacy and character to your landscape. In this guide, we’ll explore everything you need to know about caring for these popular plants in New England.


Choosing the Right Variety

Before you dive into planting Arborvitae or Western Red Cedar, it’s essential to choose the right variety that suits your landscape and environmental conditions. Consider factors like light requirements, mature size, foliage color, and growth rate.

For Full Sun to Light Shade: American Arborvitae (Thuja occidentalis)

  • Emerald Green (‘Smaragd’)
  • Dark American (‘Nigra’)
  • Degroot’s Spire
  • American Pillar
  • Golden Globe

For Full Sun to Shade: Western Red Cedar (Thuja plicata)

  • Green Giant
  • Steeplechase
  • Whipcord
  • Forever Goldy


Western Red Cedars at Mahoney's in Winchester

Western Red Cedars at Mahoney’s in Winchester

Planting Tips

Follow these guidelines for successful Arborvitae and Western Red Cedar transplantation:

Soil Requirements: Ensure your soil drains well. Amend heavy clay soils with organic matter and gypsum. These plants have broad root systems, so dig a hole at least twice as wide as the root ball to encourage root spread.

Care in the First Two Years: Pay special attention during the first two years after planting. Adequate watering, especially during dry spells, is critical.
Fertilizing: Apply all-purpose slow-release fertilizer in early spring before new growth fully emerges. Fall fertilizing at half the spring amount helps establish healthy root systems.

Pruning: Arborvitae typically don’t require much pruning, but if needed, shear the outermost growth in late spring to shape or manage size. Start early to avoid overgrowth.


For a handy, printable version of this information, check out our Arborvitae and Western Red Cedar care guide!


Printable Care Guide


You can also watch our Proper Planting video with Patrick on the basics of planting a tree or shrub!

Common Problems and Solutions

Heat Stress: Hot, dry weather can induce heat stress and invite spider mite infestations. Ensure regular, deep watering to boost plant vigor and natural defenses.

Bagworm Moths: While not typically destructive, bagworms can cause unsightly defoliation. Hand removal is often sufficient or use organic pesticides like Neem Oil for larger infestations.

Deer Damage: In areas with high deer populations, consider planting Western Red Cedar (Thuja plicata) as it’s less favored by deer compared to Eastern Arborvitae (Thuja occidentalis).


Seasonal Needle Drop

Don’t panic if your Arborvitae turns brown inside during fall; it’s a natural process called seasonal needle drop. Fresh growth in spring will fill in any gaps left by this process.


Fall Watering

Keep your Arborvitae and other evergreens well-hydrated in autumn, as it prepares them for the harsh winter conditions common in New England. Water regularly from September through early December to reduce winter stress. For more information on establishment watering for newly planted trees, see our printable Planting Guide. 


Varieties

Here are some popular Arborvitae cultivars carried at Mahoney’s Garden Centers:

American Arborvitae (Thuja occidentalis)

  • Emerald Green ‘Smaragd’
  • Dark American ‘Nigra’
  • Degroot’s Spire
  • American Pillar
  • Golden Globe

Western Red Cedar (Thuja plicata)

  • Green Giant
  • Steeplechase
  • Whipcord
  • Forever Goldy


Please note that actual plant characteristics may vary depending on soil, sunlight, and water conditions.


Incorporating Arborvitae and Western Red Cedar into your New England or Boston garden can be a delightful addition, providing year-round beauty, privacy, and resilience. These versatile plants, with proper care and maintenance, will thrive in your outdoor space, enhancing its charm for years to come.


Shop a wide selection of Arborvitae and Wester Red Cedar in-store and select varieties online.

Shop Online


Video: Nancy Creates a Fall Container Display Mixing Annuals and Perennials

Watch as Nancy uses a blend of annuals and perennials to create a fall container garden. Who says you can’t mix annuals and perennials in the same container! Here Nancy mixes woods purple aster (Eurybia spectabilis), ornamental grass (Pennisetum rubrum), Heuchera sanguinea, ornamental cabbage (Brassica oleracea), pansies (Viola × wittrockiana), and a pumpkin!