November 24, 2025
Fall Leaf Lanterns with KidsGardening
Mahoney’s is proud to be a sponsor of the KidsGardening Garden Youth Grant Program, an initiative that aligns with our mission to create opportunities for kids to play, learn, and grow through gardening. Check out some of the activities below to bring that mission into your own life!
As the days get shorter and the leaves begin to change color, fall is the perfect time to engage kids with a seasonal craft that embraces the beauty of autumn. Fall Leaf Lanterns are an easy, creative project that brings nature indoors while helping kids develop fine motor skills and appreciate the changing seasons. Plus, these lanterns add a warm, cozy glow to those longer, darker evenings.
Why Fall Leaf Lanterns?
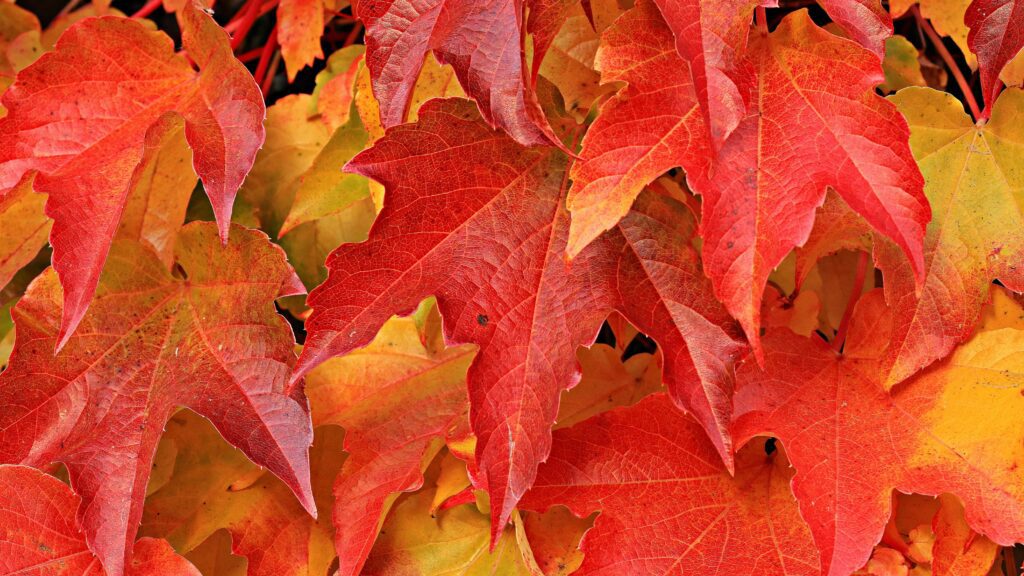
Fall is a season of transformation. As the temperature drops and daylight fades, the green chlorophyll in leaves starts to break down, revealing the brilliant oranges, yellows, and reds we associate with autumn. This process, which happens due to the Earth’s tilt and the decreasing amount of sunlight, creates stunning displays of color. By collecting fallen leaves for this craft, kids can explore and appreciate the beauty of this natural phenomenon, while also learning about how plants and animals prepare for winter.
This craft is simple, quick to make, and involves getting kids outside to gather leaves, sparking discussions about the changing season, the science behind leaf colors, and how both nature and people prepare for the colder months. Whether you’re working with a mason jar or a brown paper bag, these lanterns will brighten your home or yard with a natural glow.
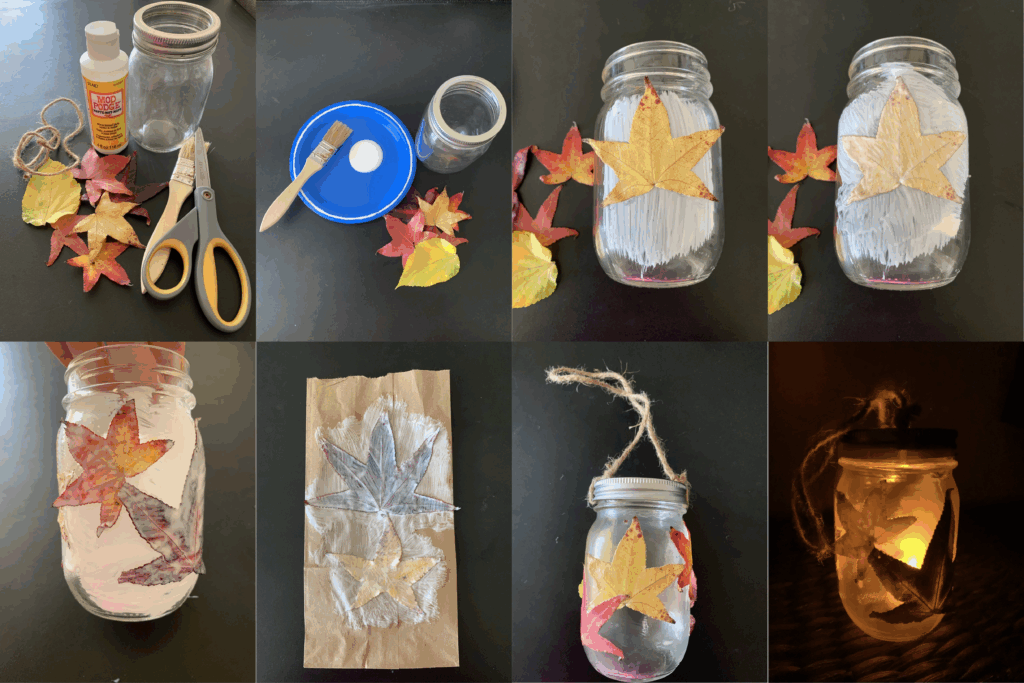
Materials You’ll Need:
- Mason jar with a screw band or brown paper lunch bag (one per lantern)
- ModPodge or clear-drying craft glue
- Paintbrush
- Flexible, freshly fallen autumn leaves
- LED tealight (one per lantern)
- Scissors
- Twine, jute cord, or ribbon (about 1 foot per lantern)
Steps to Make Your Own Fall Leaf Lanterns:
-
Take a Nature Walk:
Start by heading outdoors for a nature walk with the kids. Encourage them to gather leaves that catch their eye, focusing on those that are still soft and bendy. You can use this opportunity to talk about why leaves change color and drop from trees in the fall, and how both plants and animals prepare for the coming winter. It’s a great way to combine outdoor play with a little bit of seasonal science.
-
Set Up Your Workspace:
Once you’re back inside (or stay outside on a picnic table!), prepare your crafting space. Lay down some newspaper or wax paper to make cleanup easier, especially if you’re working with glue. Make sure the leaves are dry and trim off their stems. You’ll want to use leaves that are flexible enough to bend around your jar or bag without breaking.
-
Start Gluing the Leaves:
Using a paintbrush, have the kids apply a thin layer of glue onto their mason jar or paper bag. They can then press a leaf onto the glue. Once the leaf is in place, brush another layer of glue over it to secure it. It’s okay if some parts of the leaf stick up a little—this will add texture and dimension to the lantern. Remind the kids to leave some gaps between leaves so the light can shine through more brightly.
-
Get Creative with the Design:
Kids can continue adding leaves, getting creative with their designs. You can encourage them to experiment with different leaf placements and colors. Just make sure to leave the bottom of the jar or bag free of glue and leaves so the lantern can dry upright without sticking to any surfaces.
-
Let It Dry:
Allow the lanterns to dry until the glue turns clear and solid, which usually takes about two to three hours. This is a great time to talk more about the colors of fall and why different trees produce different shades of yellow, orange, red, and purple.
-
Add a Handle:
Once the glue is dry, it’s time to attach a handle. For mason jars, tie a piece of twine to both sides of the jar’s screw band and then screw the band onto the jar. For paper bags, punch two holes at the top and tie a piece of twine to either side to form a handle.
-
Light It Up:
Now for the fun part! Place one or more LED tealights inside each lantern, and they’re ready to glow. You can use them to light up a cozy indoor corner or take them on a magical evening walk through your yard or neighborhood.
Why Kids Love It:
Making Fall Leaf Lanterns offers kids a creative outlet that also connects them with nature. It’s hands-on, tactile, and encourages outdoor exploration. Plus, the finished lanterns give them a sense of pride and ownership as they light up the darker fall evenings with their homemade creations.
So gather your supplies, head outside, and embrace the colors and magic of fall with this fun and simple craft! Not only will it get kids excited about the season, but it will also help them appreciate the beauty in nature’s transition into winter.
Full Instructions Here!