January 24, 2025
How to Kickstart Your Garden: Seed Starting Tips for New Englanders
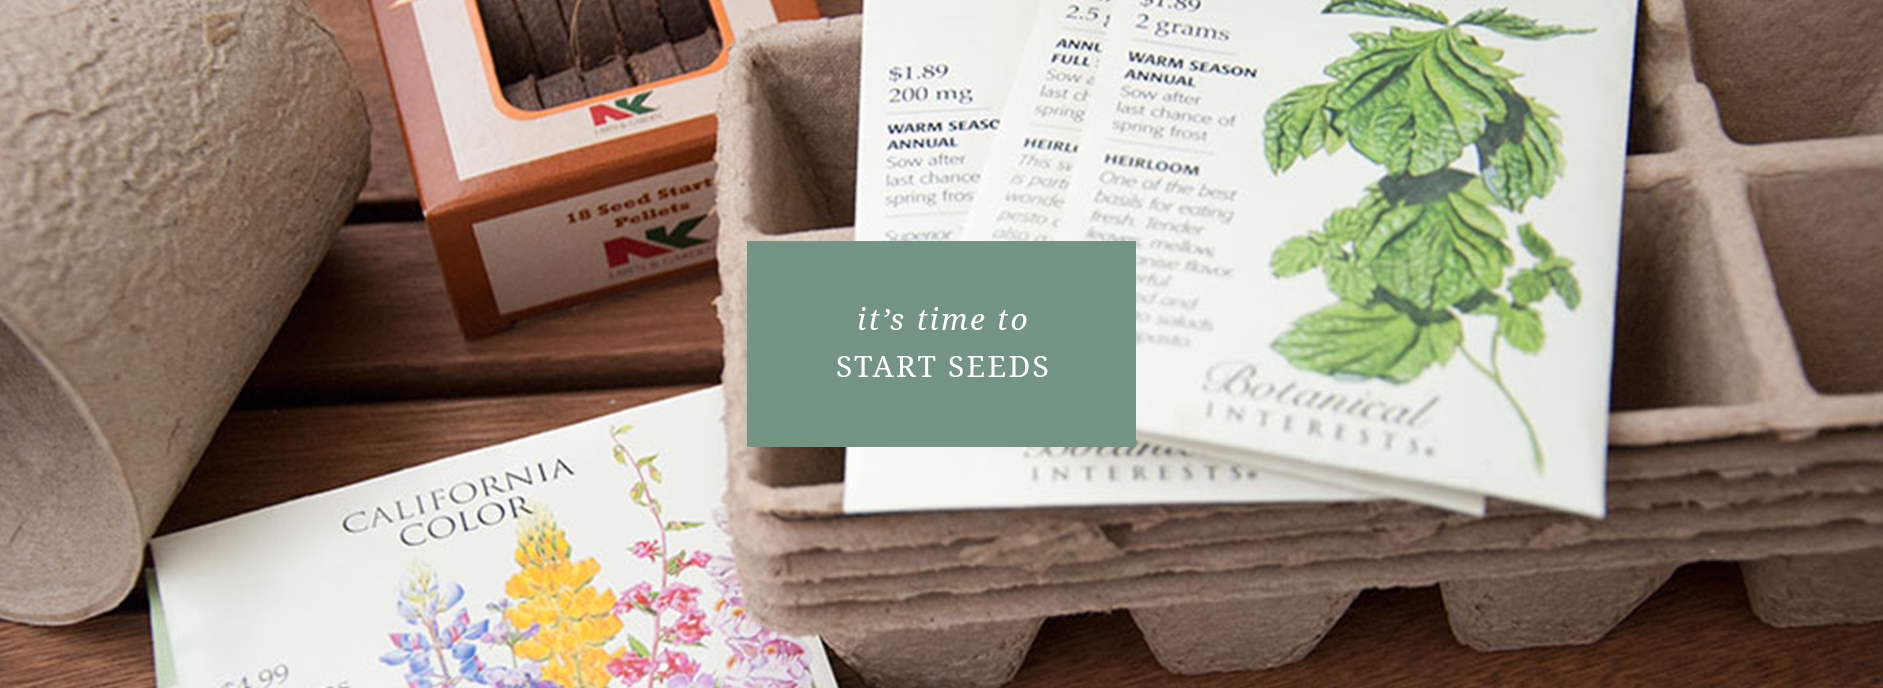
The world of gardening in New England can be a whirlwind, where the seasons change when they want, and the growing season can sometimes feel fleeting. If you’ve ever dreamt of cultivating your own lush garden, there’s no better way to kickstart the process than by mastering the art of seed starting. In this beginner-friendly guide, we’ll take you through the basics of seed starting in New England, helping you start gardening right now!
Understanding Your Hardiness Zone
New England’s diverse climate spans USDA Hardiness Zones 4 to 7, meaning we experience cold winters and warm summers. Understanding your specific zone is crucial for selecting seeds that thrive in your local conditions. The USDA Plant Hardiness Zone Map is an excellent resource to identify your zone and plan your gardening calendar accordingly. You can find our blog post on the recent change in the zone map here!
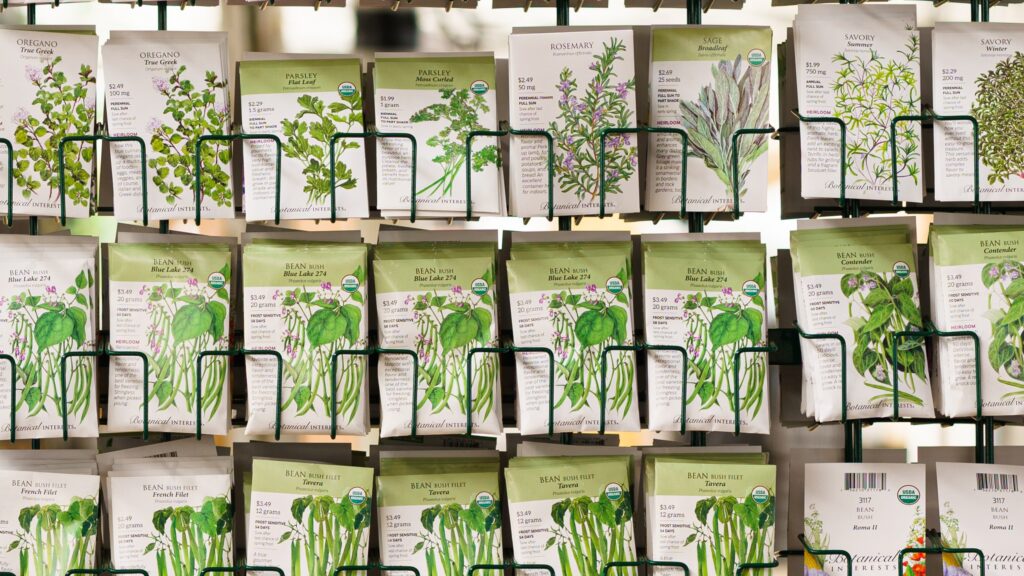
Botanical Interests seed selection at Mahoney’s in Winchester, MA
Choosing the Right Seeds
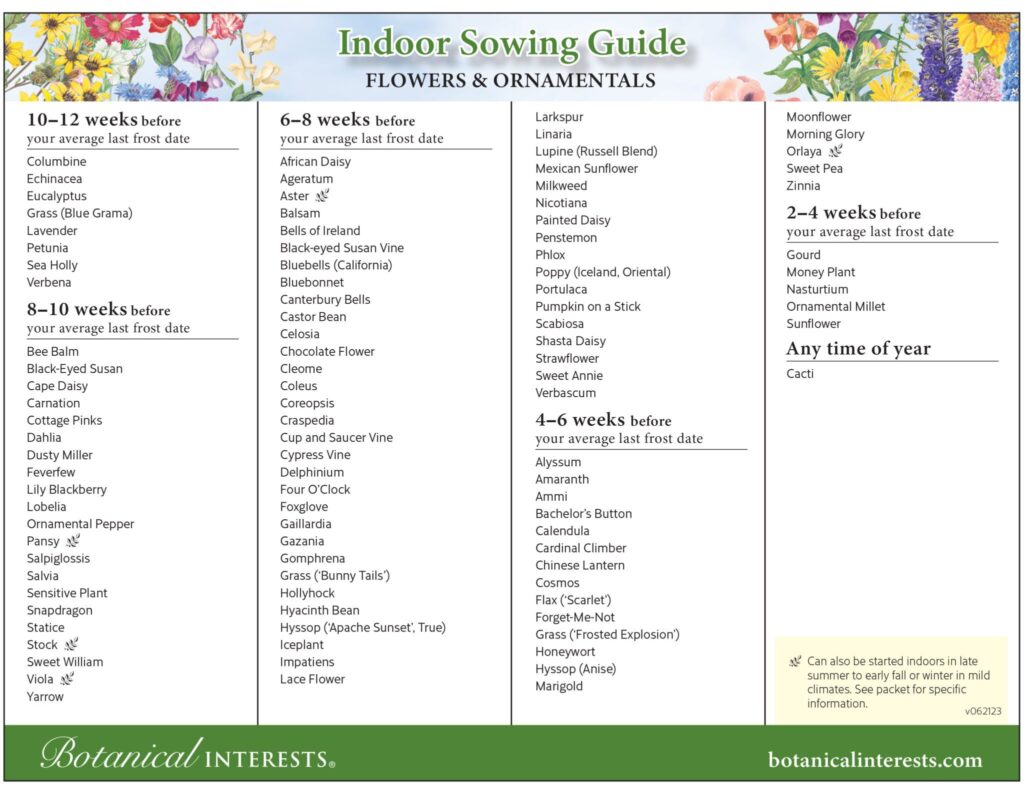
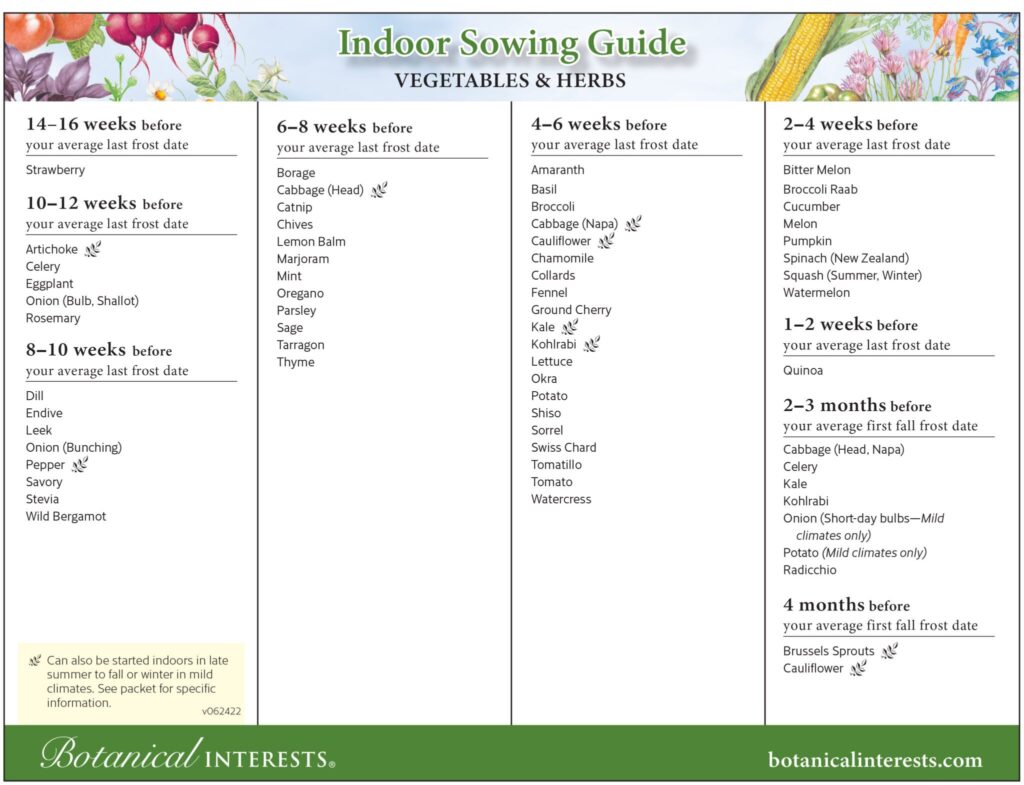
Selecting the right seeds is like choosing the cast for your gardening production. Consider factors such as your region, soil type, and sunlight availability. For us in states like Massachusetts, New Hampshire, and Rhode Island, cool-season crops like lettuce, kale, and broccoli are perfect for early spring, while warm-season crops like tomatoes and peppers can be started indoors in late winter. But don’t worry, we’ve made it easy for you, take a look at the table provided by our vendor, Botanical Interests, that shows you exactly what to plant and when!
Timing is Everything
In New England, where frost dates can be unpredictable, timing is key. Consult your local agricultural extension office or use online resources to determine the last frost date in your area. Count backward from this date to determine when to start your seeds indoors. This ensures your seedlings are strong and ready to be transplanted when the soil is warm enough.
Creating the Ideal Environment
Set up a dedicated space for your seeds to germinate and grow. Ensure they receive sufficient light, either from a south-facing window or using artificial grow lights. Maintain a consistent temperature, ideally between 65-75°F (18-24°C). Regularly check soil moisture and avoid overwatering, as New England’s cool indoor environments can slow down drying times.
Now you’re ready to get started! Let’s go step by step.
Step 1: Gather Your Seed Starting Supplies
Before diving into seed starting, gather the essential supplies. New England’s variable weather conditions make indoor seed starting a smart choice, allowing you to control temperature and protect delicate seedlings from unexpected late frosts.
Collect all the necessary materials before you start:
- Seeds
- Seed trays or containers
- Seed starting mix
- Seeds suitable for your region and season
- Labels (optional)
- Watering can or spray bottle
- Plastic wrap or humidity dome (optional)
- Grow lights or a south-facing window

Biodegradable Seed Starting Trays
Step 2: Choose the Right Seed Trays
Opt for trays with drainage holes to prevent waterlogging. Cell trays or peat pots work well for individual seeds. Make sure the trays are clean and have been disinfected to minimize the risk of disease.
Step 3: Fill Trays with Seed Starting Mix
Use a high-quality seed starting mix that provides good aeration and drainage. Fill each cell or container, leaving a little space at the top for watering.
Step 4: Planting Depth and Spacing
Check the seed packet for specific instructions on planting depth and spacing. As a general rule, plant seeds twice as deep as their diameter. Small seeds can be surface-sown.
Step 5: Watering
Moisten the seed starting mix before planting to ensure even water distribution. After sowing, use a gentle stream of water or a spray bottle to avoid disturbing the seeds. Keep the mix consistently moist but not waterlogged.
Step 6: Covering Seeds (Optional)
Some seeds benefit from being covered with a thin layer of vermiculite or seed starting mix to maintain moisture. Refer to the seed packet for specific instructions. You can also use plastic wrap or a humidity dome to create a mini greenhouse effect until the seeds germinate.
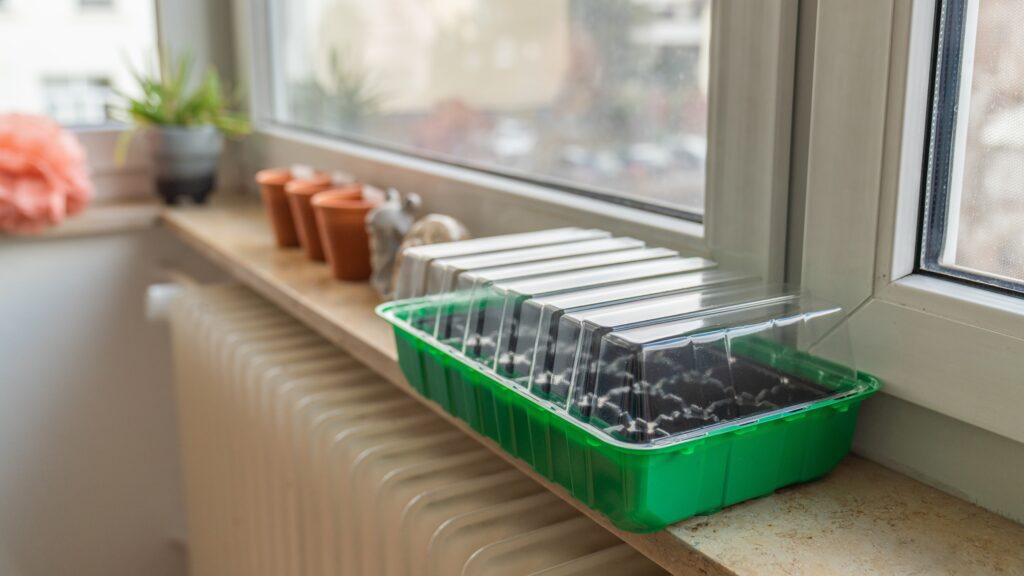
A clear dome offers added protection for seeds germinating.
Step 7: Temperature and Light
Place the trays in a warm location to encourage germination. A consistent temperature between 65-75°F (18-24°C) is ideal. Once germination occurs, move the trays to a well-lit area. If using natural light, ensure your seedlings receive at least 6-8 hours of direct sunlight. If not, supplement with grow lights placed a few inches above the seedlings for 14-16 hours per day.
Step 8: Thinning Seedlings
As seedlings grow, thin them to ensure proper spacing and prevent overcrowding. Choose the healthiest-looking seedlings and snip the weaker ones at soil level.
Step 9: Hardening Off
Harden off your seedlings by gradually exposing them to outdoor conditions for a week before planting. This helps them adjust to the changes in temperature, sunlight intensity, and wind, reducing the risk of transplant shock when they are finally moved into the garden. Select a sheltered outdoor location for your seedlings. A porch, patio, or any area that provides partial shade and protection from strong winds is ideal. We recommend the following hardening off schedule:
Day 1-2: Introduce to Shade
On the first day, place your seedlings outdoors in a shaded area for 1-2 hours. Gradually increase the time each day, exposing them to a bit more sunlight. Monitor them closely for signs of stress, such as wilting or leaf burn.
Day 3-4: Partial Sun Exposure
Move the seedlings to an area with dappled sunlight or morning sunlight for a few hours. Again, increase the time they spend outdoors each day. Ensure they are protected from strong midday sun during this phase.
Day 5-6: More Sun Exposure
Expose the seedlings to direct sunlight for longer periods, gradually increasing their exposure. By this point, they should be able to handle a few hours of direct sunlight without adverse effects.
Day 7-10: Full Sun Exposure
Towards the end of the hardening off period, your seedlings should be ready for full sun exposure. Place them in direct sunlight for most of the day, mirroring the conditions they will experience in the garden.
Keep a close eye on your seedlings throughout the hardening off process. If you notice any signs of stress, such as wilting or discoloration, scale back the exposure and increase gradually again. As your seedlings spend more time outdoors, they may require more frequent watering due to increased exposure to wind and sun. Keep the soil consistently moist but not waterlogged. During the hardening off period, be cautious of nighttime temperatures. If frost is forecasted, bring your seedlings indoors or provide them with some protection.
Once your seedlings have successfully completed the hardening off process and show no signs of stress, they are ready to be transplanted into the garden.
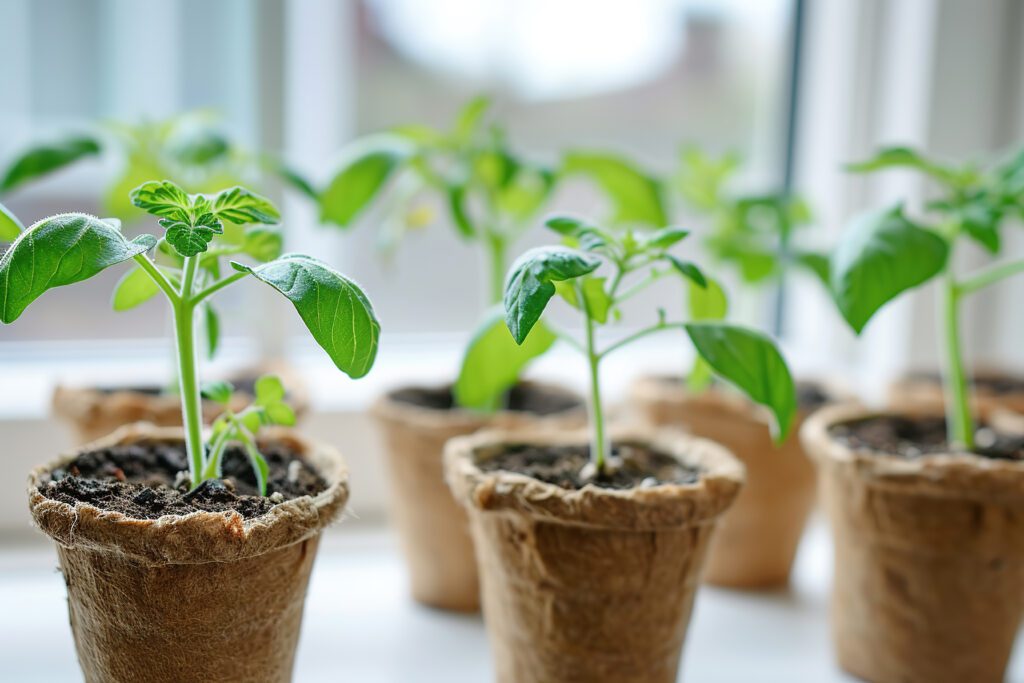
Seedlings ready for planting outdoors in Massachusetts.
Step 10: Transplanting with Care
Once your seedlings have developed sturdy roots and a couple of true leaves and the danger of frost has gone, it’s time to transplant them into your garden. Choose a sunny location and prepare your soil with compost and Bio-Tone Starter to give your plants the best start possible.
Step 11: Ongoing Care
Congratulations, you’ve successfully started your seeds and transplanted them into the garden! However, the journey doesn’t end there. Regular watering, weeding, and monitoring for pests are crucial for a thriving garden.
For other ways to start your garden a whole month earlier in creative ways check out this page from our friends at Epic Gardening and, of course, stay connected with us as we post blogs and tips specific to New England’s unique challenges and click below to find your local Mahoney’s Garden Center!
